
PinkDocs lets you create and manage multiple knowledge bases within a single WordPress site. This is ideal for maintaining separate documentation for products internal teams customers or clients while keeping everything organized and easy to manage. Follow the steps below to create a new knowledge base in detail.
When updating from V1.1.6 or earlier, all existing categories and documents will be automatically migrated into a default knowledge base named Main. You can rename this knowledge base and update its slug at any time from the settings.
How To Create Multiple Knowledge bases

- Log in to your WordPress admin dashboard
- Click PinkDocs in the left sidebar
- Select Knowledge Bases from the menu
- Click the Add New button at the top of the page
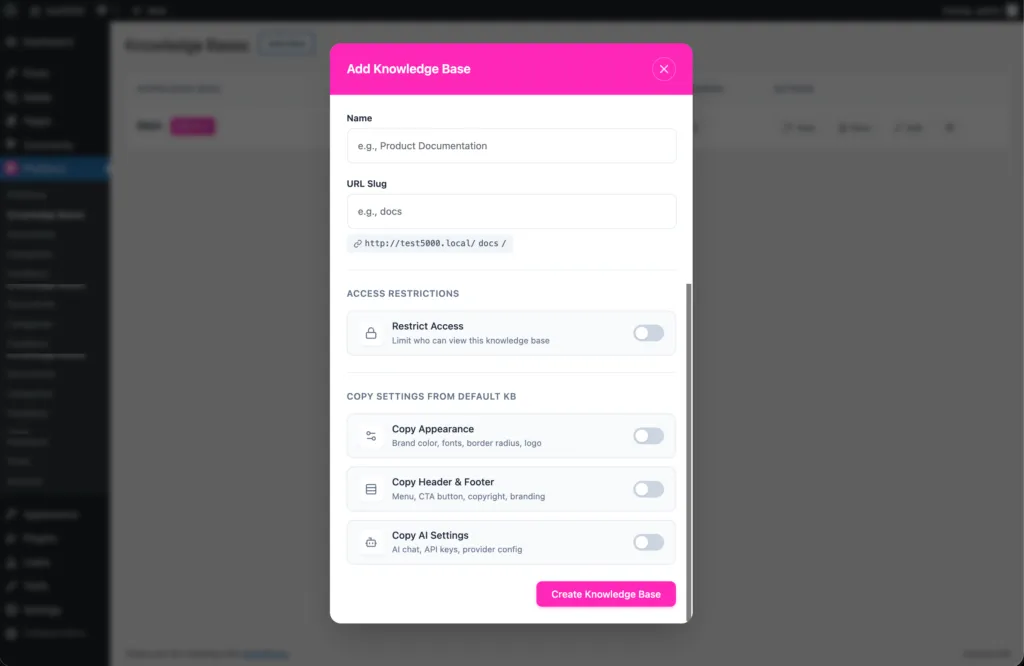
- In Name, enter the title of your knowledge base
Example: Product Documentation, Help Center, Internal Docs - In URL Slug, enter the path where the knowledge base should load
Example: docs, help, kb
This will create a URL like yoursite.com/docs - Under Access Restrictions, keep Restrict Access OFF if the knowledge base should be public
- Turn Restrict Access ON if the knowledge base should be private and only visible to logged-in users or specific roles
- Under Copy Appearance, turn this ON if you want to use the same colors, fonts, logo, and styling from your default knowledge base
- Leave Copy Appearance OFF if this knowledge base needs a different design
- Under Copy Header & Footer, turn this ON if you want the same menu, CTA buttons, footer text, and branding
- Leave Copy Header & Footer OFF if this knowledge base needs a different navigation or layout
- Under Copy AI Settings, turn this ON if you want to reuse the same AI chat, API keys, and provider configuration
- Leave Copy AI Settings OFF if this knowledge base should have different AI behavior or no AI features
- Click Create Knowledge Base to finish and create the new knowledge base
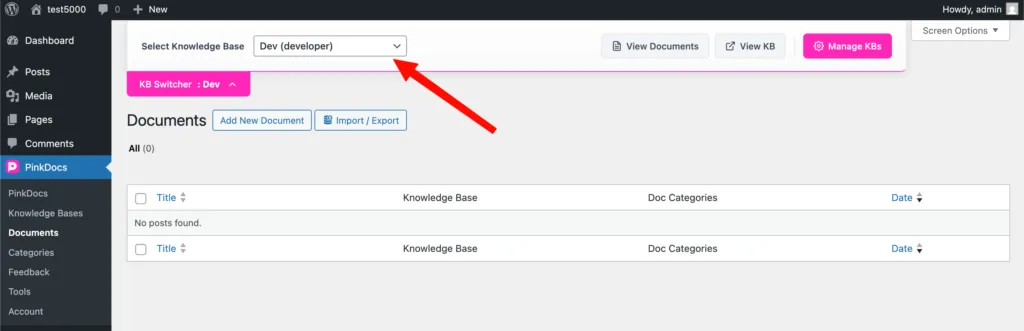
How To Switch Knowledgebases
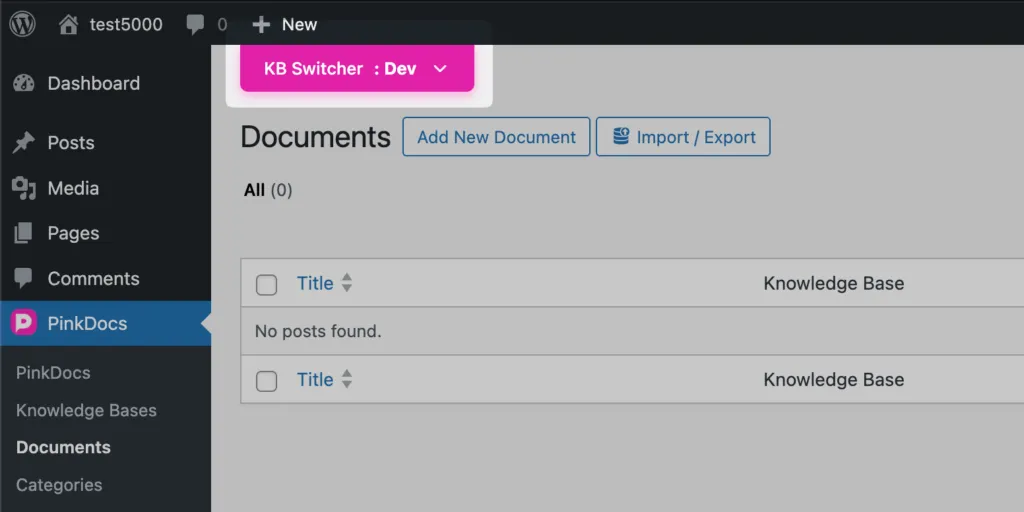
- At the top, find KB Switcher dropdown
- Click the dropdown
- Choose the knowledge base you want (example: Dev, Support, Internal)
- The KB Switcher label will update to the selected knowledge base
- You are now working inside that selected knowledge base
What Changes After Switching Knowledge Base
- Documents will show only documents belonging to the selected knowledge base
- Add New Document will create a document inside the selected knowledge base
- Import / Export will apply only to the selected knowledge base
- Categories will show and create categories only for the selected knowledge base
- Feedback will show feedback only for documents in the selected knowledge base
How to Switch Knowledgebase Inside PinkDocs Settings
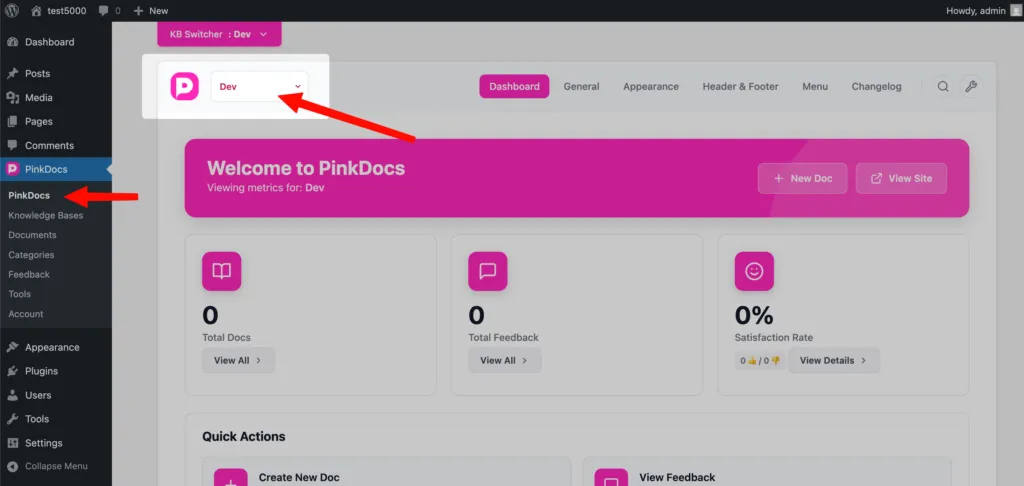
- Go to WordPress Admin → PinkDocs → PinkDocs (Dashboard)
- At the top-left, locate the KB Switcher dropdown
- Click the dropdown showing the current KB name (example: Dev)
- Select the knowledge base you want to configure
- The page reloads with the selected knowledge base active
Switching knowledge bases lets you manage and customize settings for that specific knowledge base only. Any changes you make apply exclusively to the selected knowledge base and do not affect others.
PRO TIP: To maintain consistency, make all design and settings changes in your default knowledge base first. Then, copy those settings from the edit menu of the other knowledge bases under the Knowledge Bases menu.
Was this page helpful?
Great! What worked best for you?
Please
provide
additional details about your experience.
✓ Thank you for your feedback! We appreciate your input.