
This guide explains how to enable Text to Speech in PinkDocs using Google Cloud Text to Speech. You will also learn how to configure it with or without the Translation API, secure your API key, and understand how the audio player works on the frontend.
Requirements
Before enabling Text to Speech, make sure you have:
- A Google Cloud account
- Billing enabled on your Google Cloud project (required by Google to use Text to Speech API)
- Cloud Text to Speech API enabled
- An API key created in Google Cloud
Create and Configure Google Cloud Project
First step
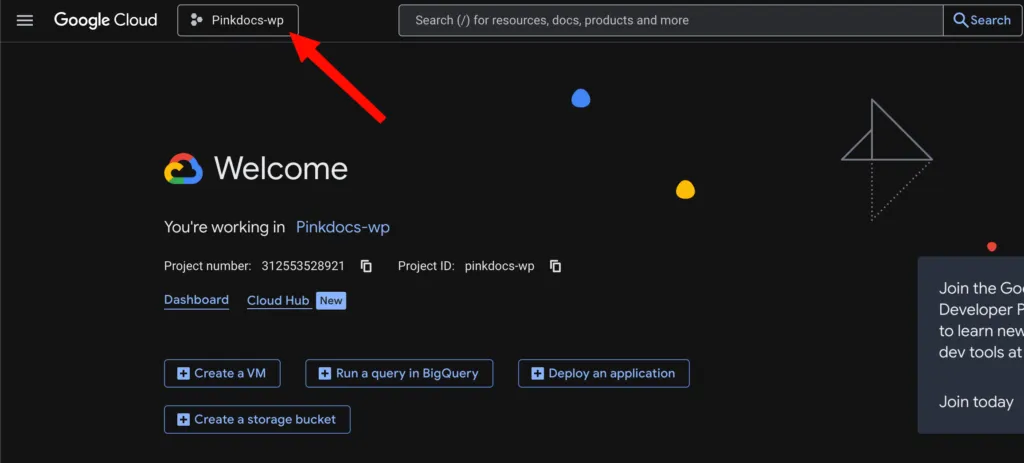
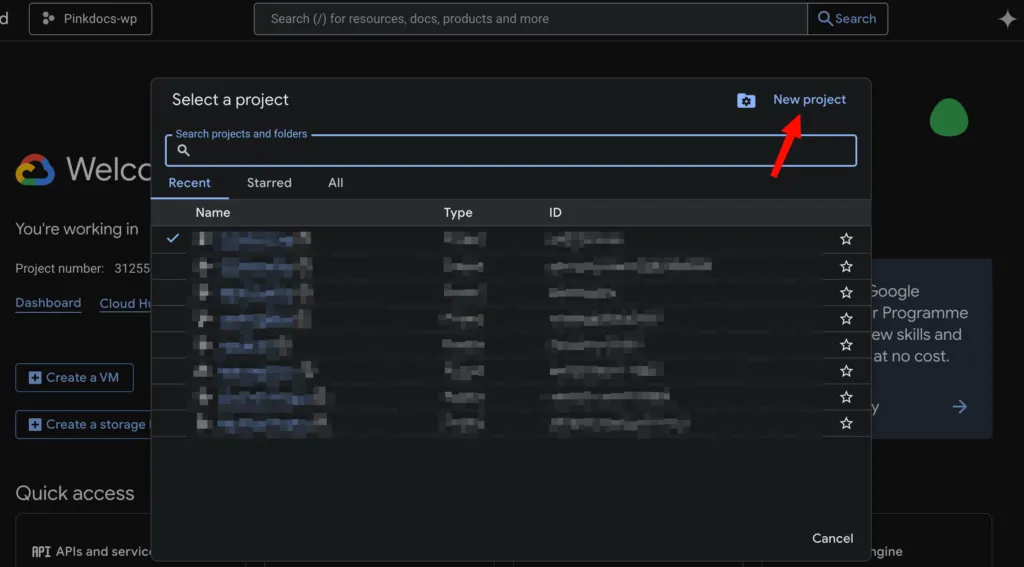
Second step
Click Select Project → New Project
Third step
Enter a name and create the project
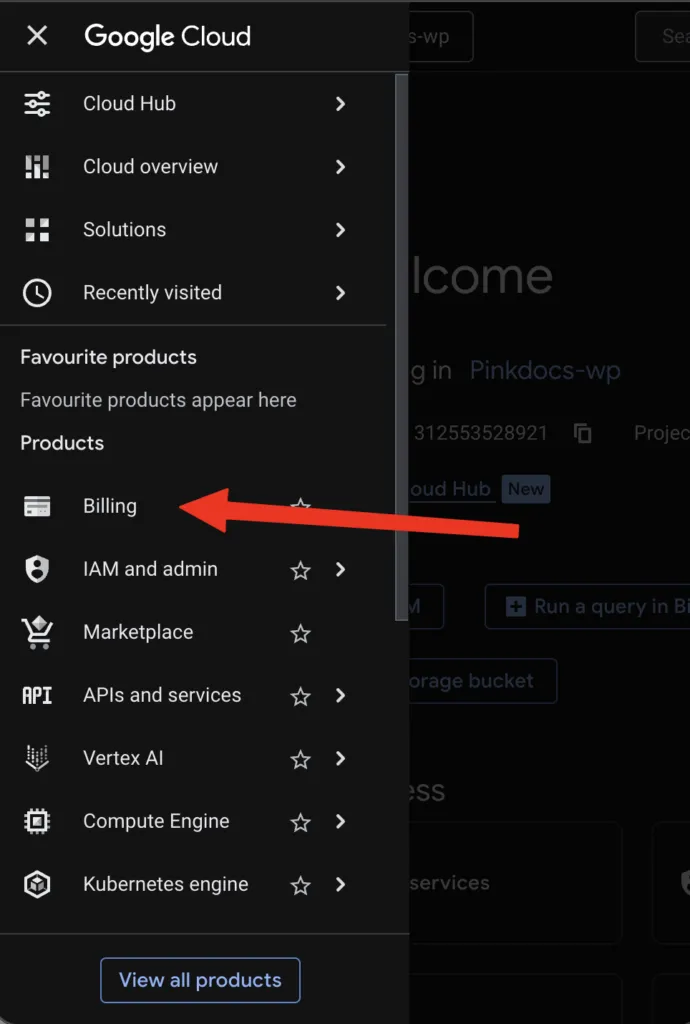
Enable Billing
Go to Billing and attach a billing account to your project
Enable Required APIs
Go to APIs & Services → Library and enable:
- Cloud Text-to-Speech API (Required) – https://console.cloud.google.com/apis/library/texttospeech.googleapis.com
- Cloud Translation API (v2) (Optional – only if using multi-language translation)
Create an API Key
- Go to APIs & Services → Credentials
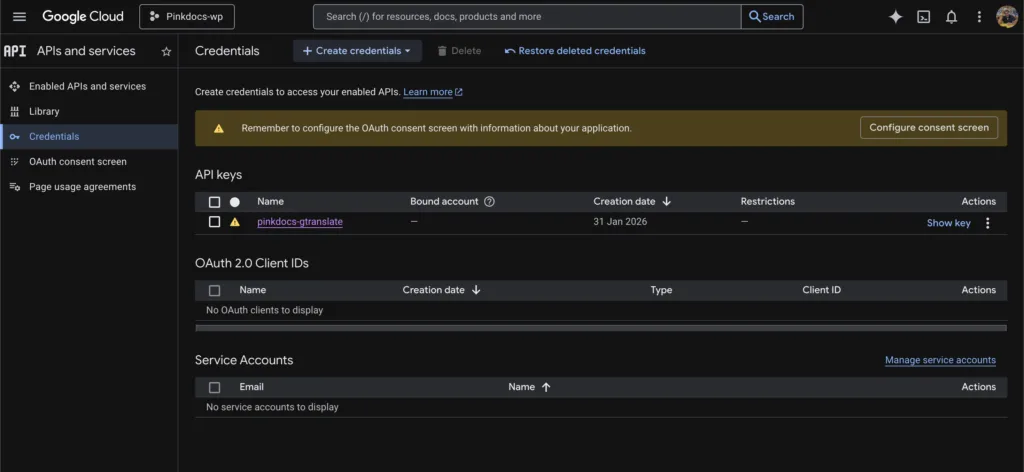
- Click Create Credentials → API Key
- Copy the generated API key
Add API Key Restrictions
To prevent misuse:
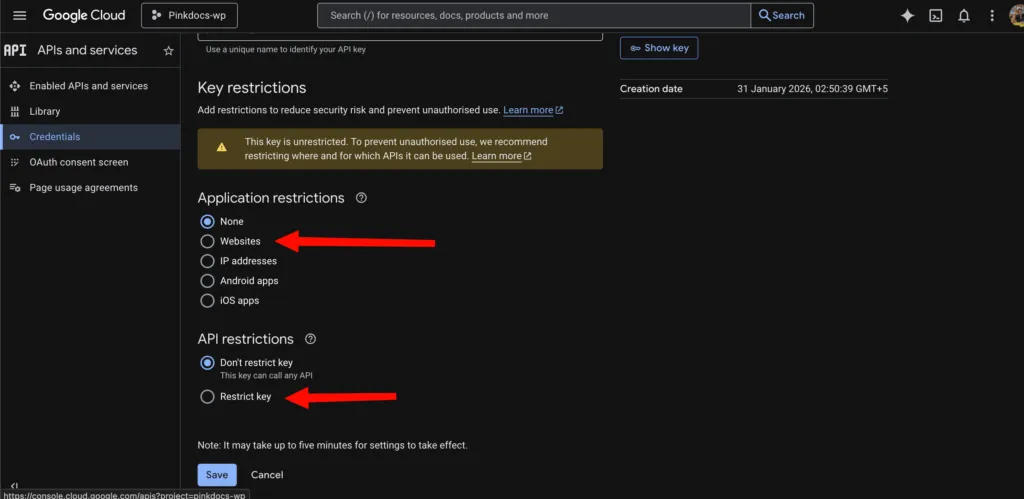
- Go to Credentials
- Click your API Key
- Under Application Restrictions, choose:
- HTTP referrers (websites)
Add your domain:https://yourdomain.com/*
- HTTP referrers (websites)
- Under API Restrictions
- Select Restrict key
- Choose:
- Cloud Text-to-Speech API
- (Optional) Cloud Translation API
- Click Save
Enable Text to Speech in PinkDocs
Go to:
WordPress Dashboard → PinkDocs → Header and Footer → Footer
You will see the Text to Speech section:
Text to Speech Settings
- Toggle Text to Speech → ON
- Enable Cloud Text-to-Speech API in your Google project
- Choose one of the following:
If you are already using Translation:
- Enable Translation toggle
- Paste your API key in Translation API Key
- Under Text to Speech, check:
Use Translation API key
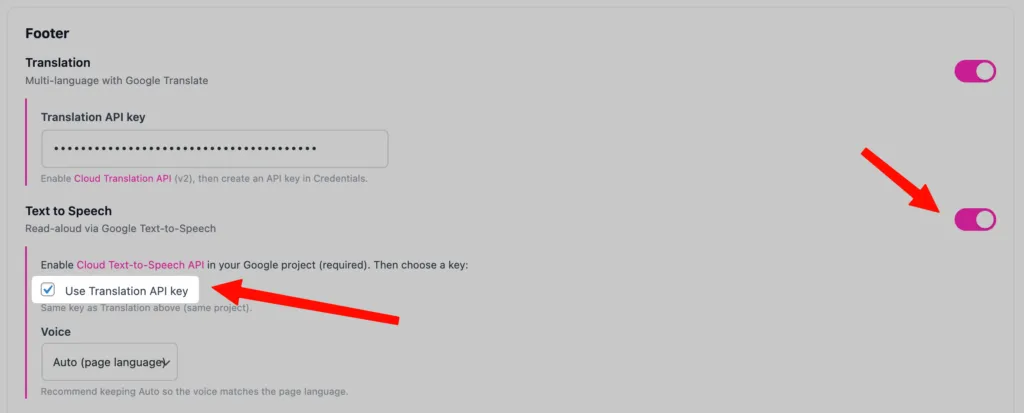
This uses the same key for both services.
If not using Translation:
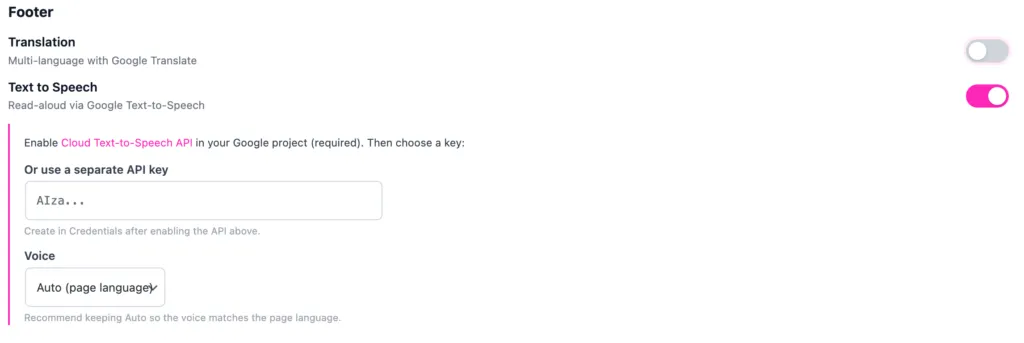
- Leave Translation disabled
- Enable Text to Speech
- Paste your Text-to-Speech API key
- Save settings
Voice Setting
You can select:
- Auto (page language) – Recommended
Automatically matches the voice to the page language.
Or manually select a specific voice if required.
When you select:
Auto (page language)
PinkDocs will:
- Detect the current page language
- Automatically select a matching Google voice
- Deliver a natural experience for multilingual documentation
Best for:
- Multi-language documentation
- Sites using Translation API
- Knowledge bases serving global users
If your page is:
- English → English voice
- Spanish → Spanish voice
- French → French voice
- German → German voice
This ensures voice and content language always match.
2️⃣ Standard vs Wavenet Voices
When selecting a manual voice, you’ll see options like:
en-US Standard Aen-US Standard Den-US Wavenet Aen-US Wavenet Des-ES Standard Afr-FR Standard Ade-DE Standard A
Here’s what they mean:
Standard Voices
- Basic high-quality voices
- Lower cost
- Suitable for most documentation
- Slightly more robotic tone compared to Wavenet
Recommended for:
- Large documentation libraries
- Budget-conscious projects
- Internal knowledge bases
Wavenet Voices
- Premium AI-powered voices
- More natural and human-like
- Better intonation and flow
- Slightly higher cost in Google Cloud pricing
Recommended for:
- Public-facing documentation
- Premium SaaS products
- Accessibility-focused websites
- Professional brand voice experience
Voice Naming Explained
Example:en-US Wavenet A
Breakdown:
en→ Language (English)US→ Region (United States)Wavenet→ Voice typeA→ Voice variant (different tone/gender)
Different letters (A, B, C, D) represent:
- Different voice personalities
- Male or female variations
- Slight tone differences
Which Voice Should You Choose?
Single-language website (English only)
→ Choose en-US Wavenet A (best quality)
Multi-language website
→ Use Auto (page language)
Budget-sensitive
→ Choose Standard voice
Where the Audio Button Appears
Once enabled:
1. Top Article Header
A Listen button appears near:

- Reading time indicator
- Last updated date
It toggles:
- ▶ Listen
- ⏸ Listening…
2. Floating Audio Player (Bottom Right)
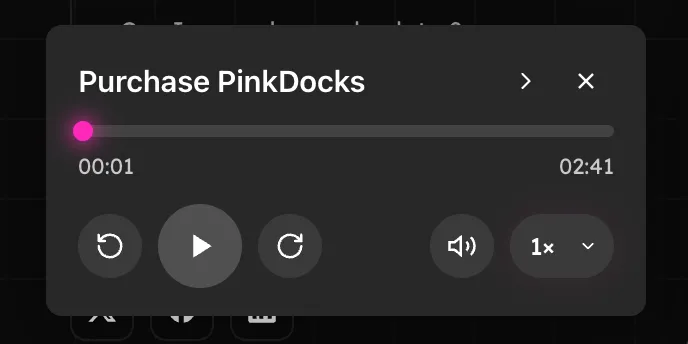
When playback starts, a floating audio player appears in the bottom-right corner containing:
- Progress bar
- Play / Pause
- Restart
- Forward
- Volume control
- Playback speed (1x)
Users can:
- Close the player
- Continue browsing while listening
How Audio Works
- Audio is generated dynamically using Google Cloud Text to Speech.
- The article content is converted into speech.
- The audio is streamed via the floating player.
- Audio language matches the page language (if Auto is selected).
Text to Speech is now successfully enabled 🎉
Your documentation readers can now listen to articles directly from the page for improved accessibility and user experience.